
Yes, you read that right. We are using Capistrano – a very popular application deployment tool that is written in Ruby to deploy a Python Django app. In fact, you can deploy any application written in any language using Capistrano. We have been using Capistrano to deploy Rails apps for a very long time and has been the obvious tool of choice for deployments.
We recently moved our entire code base to GitLab and we really wanted to leverage the CI-CD capabilities that GitLab provided out of the box. Some of our apps are built and deployed using Docker, which can be easily deployed using GitLab CI-CD but deploying Django wasn’t pretty straight forward, and that’s how we ended up using Capistrano.
1. Install bundler
Install bundler if you don’t have it yet.
gem install bundler
2. Add Gemfile
We will add a Gemfile to specify the gems we will need. Mostly we would need only the Capistrano gem, but I needed the ed25519 gem as well, as I am using a ed25519 SSH key.
source "https://rubygems.org"

git_source(:github) {|repo_name| "https://github.com/#{repo_name}" }

gem "capistrano", '~> 3.11.2'
gem 'ed25519', '>= 1.2', '< 2.0'
gem 'bcrypt_pbkdf', '>= 1.0', '< 2.0'
3. Do bundle install
bundle install
This will install all the required gems including Capistrano.
4. Initiate Capistrano on the project
bundle exec cap install
This command would create a few files inside your project directory, with some boilerplate code for deploying your code. You basically have to tweak them as per your requirements.
Few files that this would create are:
Capfile– main Capistrano fileconfig/deploy.rb– main deploy scriptconfig/deploy/staging.rb– staging specific Capistrano directivesconfig/deploy/production.rb– production specific
5. Tweak Capistrano
Now, all you need to do is, modify these files to tell Capistrano where to find your project code (Git repo), server details, where you want to upload the files on the server and what files need symlinked etc.
Here is what ours look like for deploying a Django app that uses nginx, gunicorn and celery stack.
Capfile
# Load DSL and set up stages
require "capistrano/setup"

# Include default deployment tasks
require "capistrano/deploy"

require "capistrano/scm/git"
install_plugin Capistrano::SCM::Git
config/deploy.rb
lock "~> 3.11.2"

set :application, "ApplicationName"
set :repo_url, "[email protected]:group/sub-group/app.git"
set :keep_releases, 10

append :linked_files, "app_name/local_settings.py" # could be .env or any file you probably use for config variables
append :linked_dirs, "media"

set :deploy_to, "/var/www/app_name"
set :ssh_options, forward_agent: true

namespace :deploy do

  desc "Run post-deploy actions (migrate and collect static)"
  task :post_deploy do
    invoke 'deploy:install_deps'
    invoke 'deploy:migrate'
    invoke 'deploy:collect_static'
    invoke 'deploy:restart'
  end

  desc "Install dependencies"
  task :install_deps do
    on roles(:app), in: :sequence, wait: 5 do
      within release_path do
        execute("source #{fetch :venv_path}/bin/activate")
        execute :pip, :install, '-r', 'requirements.txt'
      end
    end
  end

  desc "Migrate database"
  task :migrate do
    on roles(:app), in: :sequence, wait: 5 do
      within release_path do
        execute :python, 'manage.py', 'migrate', '--no-input'
      end
    end
  end

  desc "Collect static"
  task :collect_static do
    on roles(:app), in: :sequence, wait: 5 do
      within release_path do
        execute :python, 'manage.py', 'collectstatic', '--no-input'
      end
    end
  end

  desc "Restart Gunicorn"
  task :restart do
    on roles(:app), in: :sequence, wait: 5 do
      execute :sudo, :service, 'gunicorn', :restart
    end
  end
end

after 'deploy:finished', 'deploy:post_deploy'
config/deploy/staging.rb
server "myapp.com", user: "username", roles: %w{app db web}
set :deploy_user, 'username'

set :branch, "staging"
set :stage, :staging

set :venv_path, "/home/username/venvs/app-name"
SSHKit.config.command_map[:python] = "#{fetch :venv_path}/bin/python"
SSHKit.config.command_map[:pip] = "#{fetch :venv_path}/bin/pip"
config/deploy/production.rb
server "myapp.com", user: "username", roles: %w{app db web}
set :deploy_user, 'username'

set :branch, "master"
set :stage, :production

set :venv_path, "/home/username/venvs/app-name"
SSHKit.config.command_map[:python] = "#{fetch :venv_path}/bin/python"
SSHKit.config.command_map[:pip] = "#{fetch :venv_path}/bin/pip"
6. Ready to deploy
You need to make sure that the directory mentioned in the deploy_to directive has been created and has the required file permissions.
Now, lets check if everything is in order. The following command would check if Capistrano can reach your git repo, SSH to server and verify folder permissions.
bundle exec cap staging deploy:check
At this point, you could simply, run a deployment to your staging or production servers using the following commands, respectively.
bundle exec cap staging deploy
bundle exec cap production deploy
More commands are available:
bundle exec cap -T
7. Auto deploy using GitLab CI/CD
Now that we can run deployments from your local machine, create a .gitlab-ci.yml file on the root of your project directory to tell GitLab to auto deploy your app.
image: ruby:2.6

stages:
  - deploy

deploy_staging:
  stage: deploy
  environment:
    name: staging
    url: https://$STAGING_HOST
  before_script:
    - 'which ssh-agent || ( apt-get update -y && apt-get install openssh-client git -y )'
    - eval $(ssh-agent -s)
    - echo "$DEPLOY_PRIVATE_KEY" | base64 -d | ssh-add -
    - mkdir -p ~/.ssh
    - chmod 700 ~/.ssh
    - ssh-keyscan $STAGING_HOST >> ~/.ssh/known_hosts
    - chmod 644 ~/.ssh/known_hosts
    - '[[ -f /.dockerenv ]] && echo -e "Host *\n\tStrictHostKeyChecking no\n\n" > ~/.ssh/config'
    - git config --global user.email "[email protected]"
    - git config --global user.name "Name"
    - gem install bundler
    - bundle install
  script:
    - bundle exec cap staging deploy
  only:
    - staging

deploy_production:
  stage: deploy
  when: manual
  environment:
    name: production
    url: https://$PRODUCTION_HOST
  before_script:
    - 'which ssh-agent || ( apt-get update -y && apt-get install openssh-client git -y )'
    - eval $(ssh-agent -s)
    - echo "$DEPLOY_PRIVATE_KEY" | base64 -d | ssh-add -
    - mkdir -p ~/.ssh
    - chmod 700 ~/.ssh
    - ssh-keyscan $PRODUCTION_HOST >> ~/.ssh/known_hosts
    - chmod 644 ~/.ssh/known_hosts
    - '[[ -f /.dockerenv ]] && echo -e "Host *\n\tStrictHostKeyChecking no\n\n" > ~/.ssh/config'
    - git config --global user.email "[email protected]"
    - git config --global user.name "Name"
    - gem install bundler
    - bundle install
  script:
    - bundle exec cap production deploy
  only:
    - master
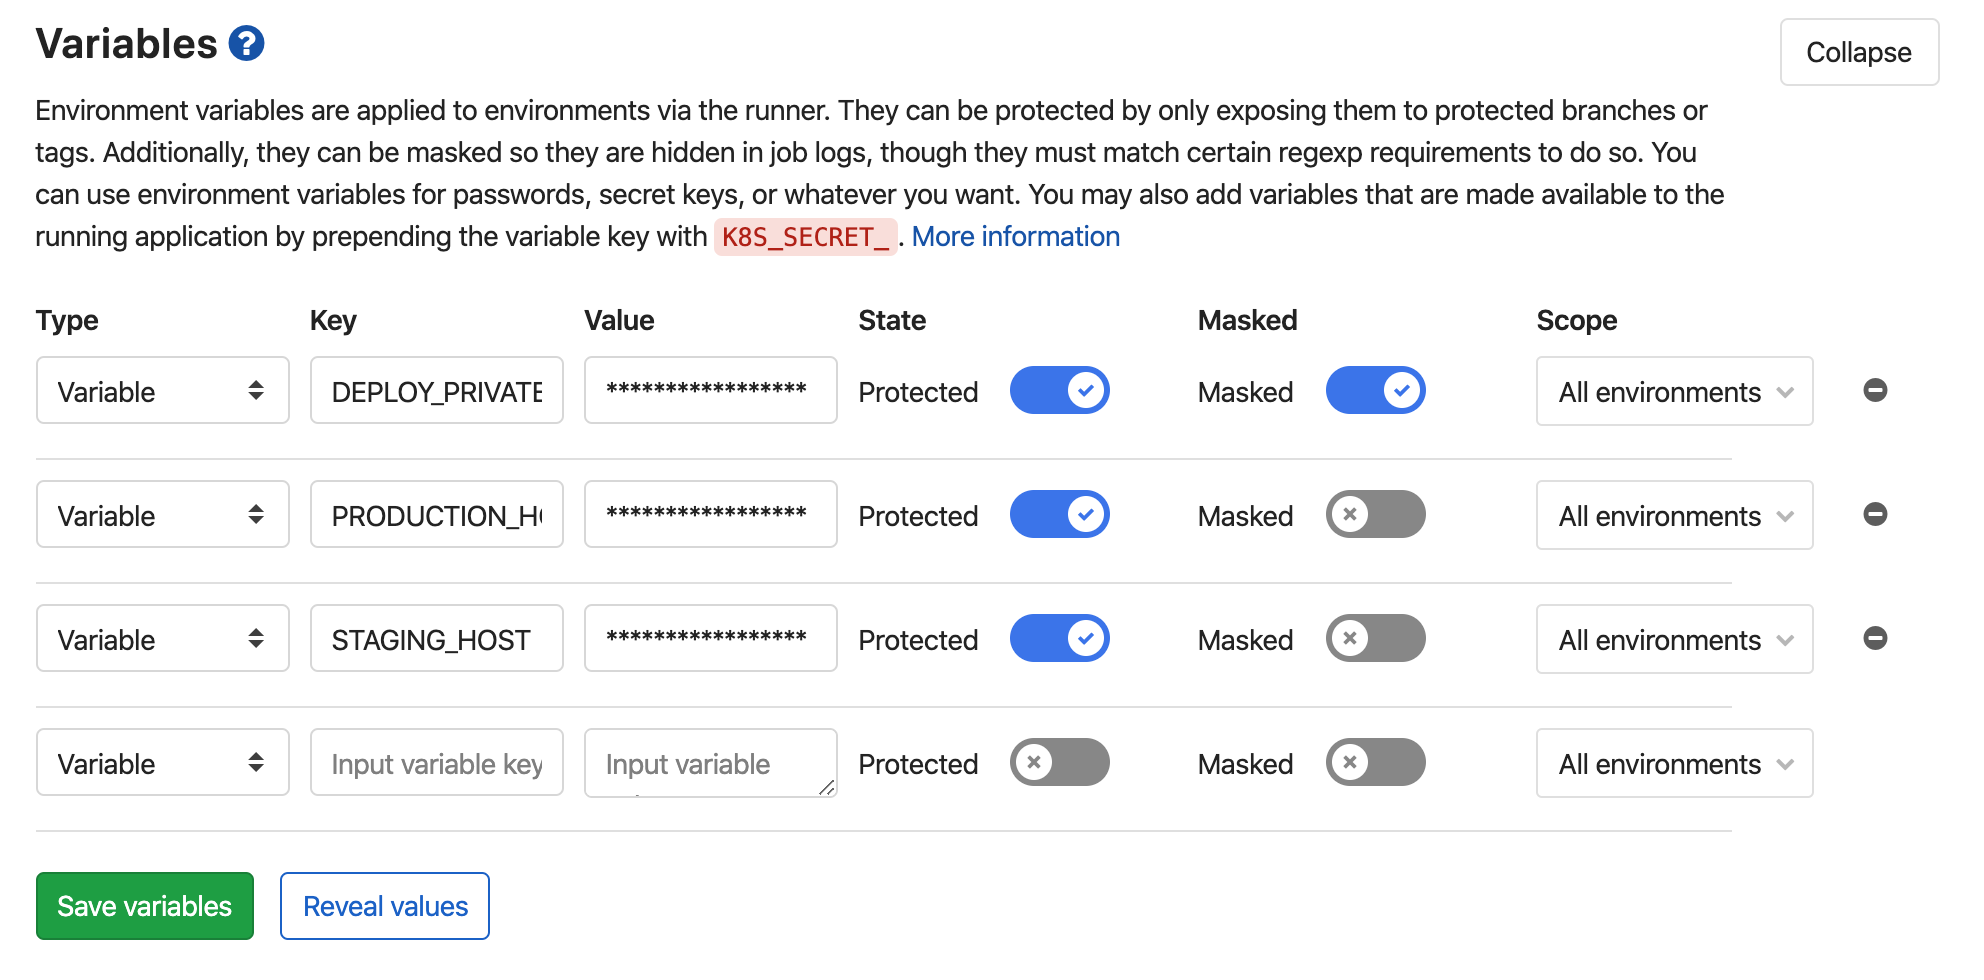
Head to Settings -> CI/CD under your project in GitLab and add the following under Variables.
DEPLOY_PRIVATE_KEYYou need to generate a new SSH key pair and hash the private key using base64, and then copy the private key as the value here. Add the public key to your servers’ authorized keys file.PRODUCTION_HOST– domain or IP of your app. e.g. www.example.comSTAGING_HOST
Now, that we have created the Gitlab CI file, try pushing to your repo, and Gitlab should pick it up and start deploying to your server.